From the ground up
🌋
Warning
This web page contains 200 megabytes of animated gifs. If that’s not your thing, please leave immediately.
Developers often talk about building games from the ground up. This turn of phrase doesn’t usually imply the involvement of any actual ground. Not so here! With this project, the first step of configuring the build environment was to fabricate a physical shed. This involved lots of IRL fun including putting together a roof and then clambering over this roof to affix sheets of bituminous waterproofing, levelling concrete slabs and plenty of slotting together of pre-cut timber.
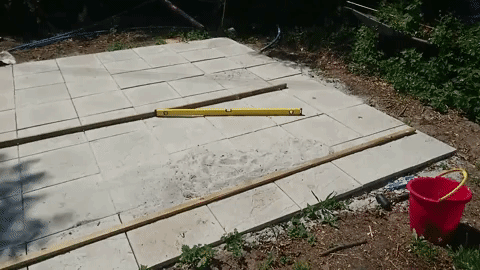
21st of June
Levelling using a long piece of 2be4 and a short spirit level (no fancy laser levels on this site).
24th of June
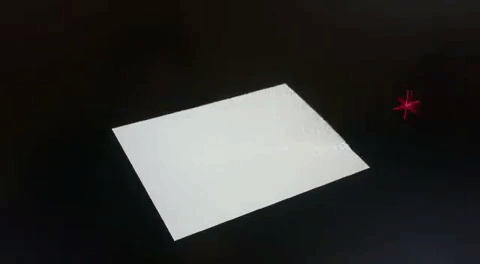
A few days later, the wood arrived (it was this kit, for those with DIY inclinations) the foundation was walkable, as demonstrated below, and we were ready to get our Lego Technic hats on to put the thing together.

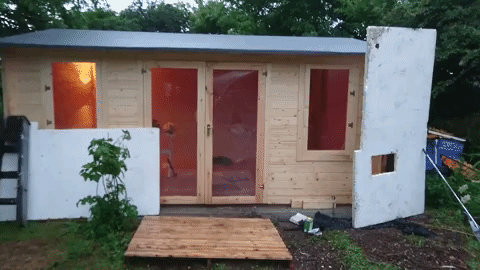
24th of June
Ziggy came to check what we were up to. He seemed happy with progress.

The log office had developed walls and a roof and doors and windows which was pretty exciting.
29th of June
A wild shed appears! You choose to step inside.
6th of July
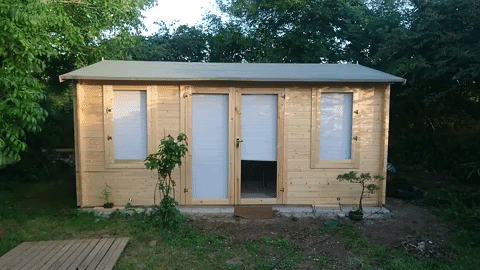
The shed acquired a nice set of blinds, and so to the keyboard!
Framework considerations
After considering Godot as potential engine because GDScript looked similar to Python, I opted to use a C++ as the language for the project. I have some experience with the language and its library ecosystem is enormous and very mature. I was initially excited about the possibility of using that new kid on the block, Rust, but unfortunately, I didn’t feel Rust’s ecosystem was mature enough to support prototypical game development.
The framework I finally settled on to offer education on standards and conventions in game program design was Urho3D. I wanted to steer well clear of monsters like Unity and Unreal 4[1] with their “user-friendliness”, corporate backing, fee structures and abhorrent popularity. I needed something open-source, reasonably mature, not too enormous and accompanied by some degree of documentation. Urho3D fits the bill for all these.
It’s a framework put together by a crazy Russian dude, @cadaver[2], latterly joined by a crazy Chinese dude, @weitjong. The codebase has the benefit of 6 years of fairly constant development. There’s an ample amount of narrative documentation along with just-about-passable generated documentation.
The framework ties together a good bunch of features:
- Build toolchain supporting compilation for Windows, Linux, macOS, iOS, tvOS, Android, Raspberry Pi and even Web targets
- Physics simulation
- DirectX and OpenGL pipeline
- Networking
| [1] | Although Aaron McLeran’s talk “The Future of Audio in Unreal Engine” (https://www.youtube.com/watch?v=ErejaBCicds) did pique my interest. |
| [2] | 👋🏿 |
Urho3D, C++
We set computers and desks and whiteboards up and I got a minimal Urho3D project up and running, figuring out enough about universe-C++ to start vaguely structuring the project wasn’t a lot of fun ... mostly because of the bewildering variety in styles of packaging libraries.
The motivation of being able to write game programs was enough to make me sit down and read through the documentation like a grownup. Urho3D’s narrative documentation is decent and I was able to investigate the new ideas it introduced with small code experiments. I have found this to help with memory retention when learning feels like “a like a lot to take in”.
I spent quite some time studying the Urho3D source code, and saw for the first time what a heavily class-based system looks like. I am not particularly interested in classes, the idea always seemed overly formal and I didn’t understand how such a structure would help give rise to a fast or understandable program. C++ is very fast, but the “user experience” of the language is not always a pleasent one.
👺
Overall I quite enjoyed the architecture of Urho3D; on top of the biscuit base of Object, there is buttery event layer and some nice container classes that implement serialisable attributes.
Attributes in Urho3D are implemented as a “variant” type which I understood as being a slightly simpler version of Python’s object. A “variant” in Urho3D can hold one of a fixed set of concrete types such as int and double, but also offers a vector and map type. All these are serialisable — for networking applications and for writing to disk.
Urho3D offers other programmer interfaces beyond the two mentioned above;[3] the result is that a programmer may write using whichever application paradigm[4] suits them. This needn’t produce programs that become difficult to reason about, in other words, programs that are either complex or complicated. On the contrary, discrete paradigms could be used to denote responsibility and aid separation of concerns.
| [3] | An entity or component system, DOM-style access to the scene graph, a decent command line interface, etc. |
| [4] | Whilst I recognise the sentimentality here, architecture could never just be a property of a computer program 🏛 |
Initial program design ideas
I started to formulate how the project should structured and thought about what might be achievable in the following months. My first idea on how get development underway was to use Urho’s entity system to build a demoscene loader, allowing many small experiments initially and envisioning its later use as a test harness to allow particular pieces of functionality to be tested in isolation. My thought was also that whatever was produced in this three-month window could be demonstrated easily; users don’t often know how to check out a different commit and recompile. 😌
8th of July

... and finally the teapots start dancing.
Something interesting
Following on from earlier work, the program feature I was most interested in investigating was mesh generation. I started with a mesh that I thought would yield the least amount of code; a grid of quads, where triangles do not share vertices and therefore the code that calculates normals is greatly simplified. My thought with writing mesh generation code rather than just loading pre-made assets (like the teapot above) was related to the type of game that I wanted to produce. In particular, I envisioned something where the images presented to the player were largely abstract. Some more exotic photographic effects (I am interested in iridescence, for example) might be incorporated, but generally “photorealism” should not be a primary goal.
Establishing that the simulation of a photograph or of film isn’t an interest presents the question; what else is there to be simulated? A game that caught my attention (and subsequently became wildly popular[5]) a few years ago was Minecraft and its description here may go some way towards answering the question.
Visually, this game makes little attempt to simulate those aspects of how photographs represent the real world that are the focus of the majority of mainstream games.
| [5] | I imply no causality. |
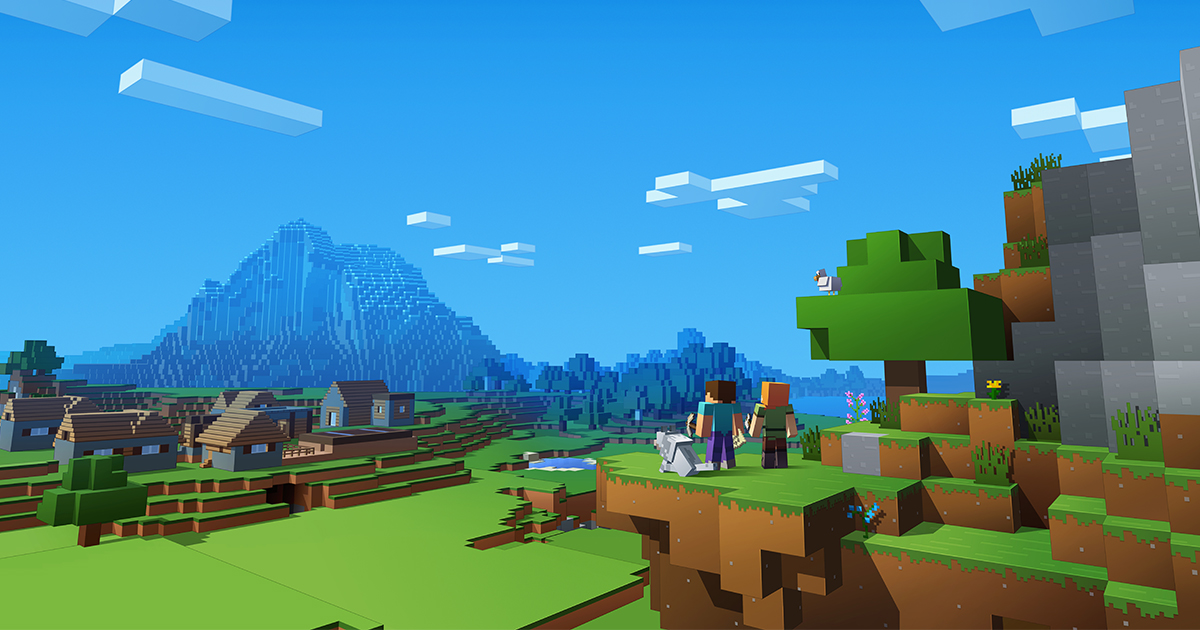
Even the above screenshot, being a promotional image from the game’s website, is doctored to include a greater degree of photographic realism than is presented when playing the game; it’s clearly not the game’s ability to simulate a photograph that makes it interesting.
The simulation that Minecraft presents is one that only exists when integrated over time. That is to say, one has to spend some time actually playing to observe (or experience, or witness) the simulation. It’s quite hard to describe what’s going on, because there are several experiential threads happening at the same time and even embarking on a description feels redundant to begin with because what the game simulates is so immediately understandable when one is playing it.
In broad strokes, the player is presented with a static simulated landscape which has been generated for their game to be played in. The playing of the game essentially involves making changes to the landscape to fulfil certain goals, however what exactly those goals are is never explicitly dicated to the player. Instead, the player must decide what their next game move will be. In this way, the simulation that Minecraft presents is that of exploring undiscovered terrain, not only because the in-game terrain is being shown to a human for the first time, but also because the game’s mechanics don’t soley rely on the player carrying out a strictly pre-determined sequence of actions in order to “successfully” interact with the simulation. Whilst it’s certainly not true that the player can do anything in Minecraft, because all the player can really do is shuffle the blocks that make up the landscape around, the motivation warranted by being able to alter one’s virtual surroundings in a sigificant way[6] is enough to make the game fascinating.
| [6] | It’s possible to re-route rivers, etc. |
If it were I choosing, perhaps I would have named this game Geology Simulator 2011.
An earlier series of games (2004—2009) that are interesting for similar reasons are Katamari Damacy, We Love Katamari, Beautiful Katamari and Katamari Forever.

Instead of following my happy tangent and deconstructing what is simulated by the Katamari series, here I will encourage the reader to buy a PS2 and a copy of the game and simply play it. It’s also possible to click on the image above to watch the intro to the game for a flavour.
Back to the keyboard
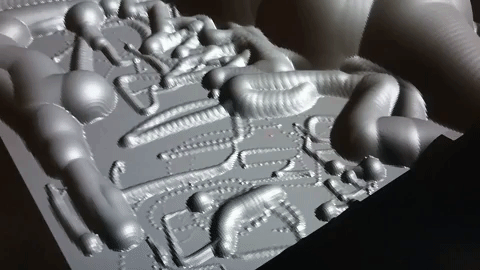
The first experiment in mesh generation was a good exercise in setting up vertex and index buffers for OpenGL to send to the GPU, describing the data layout, carrying out some simple calculations to control change in vertex position and hooking up gamepad input events to allow the player to control a kind of cursor to change the position of vertices.
25th of July
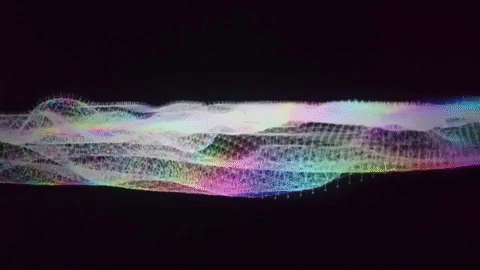
It was interesting to see how the signal from the gamepad input caused visible artifacts in the surface as the cursor was moved; the ribbed pattern in the trail left by the movement of the shape below.

Exercising more of the controller inputs to allow the player to change the radius of vertices to be affected with left and right “shoulder” triggers. It was interesting having such direct control over the geometry; I even envisioned content using some kind of sculpture tool based on this experiment.
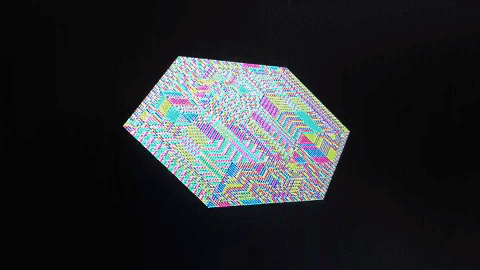
Hexagone
The next experiment was twofold; generating hexagonal mesh of arbitrary size/density using shared vertices, setting up the data structures to calculate their vertex normals.
The code for generating the flat mesh ended up being much more involved that I had anticipated. What is geometrically very intuitive can be surprisingly awkward to describe to a computer. My code ended up having crazy diagrams in it like this to let me figure out what was going on.
/*
 * interior corner
 *
 *      e-----f
 *             \
 *              \
 *  d ----(v)    a
 *          \
 *           \
 *      c     b
 *
 */
Geometrically, I got the result I wanted, but with larger n values, having the mesh generated at runtime wasn’t a feasible way forward.
29th of July
Pretty debugging colours ...
After generating the flat mesh, the next task was writing the code required to calculate the shared normals for each vertex as the mesh was deformed. The calculation itself is fairly simple: it’s basically the average of normals for all neighbouring edges of each vertex. I ended up augmenting the mesh generation code to create indexes for each vertex’s neighouring edges to simplify things.
3rd of June
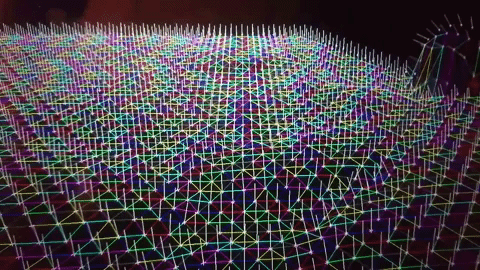
The debugging lines produced a satisfying image, so I started playing with adding some colour, experimenting with mapping vertex location to hue.
4th of June
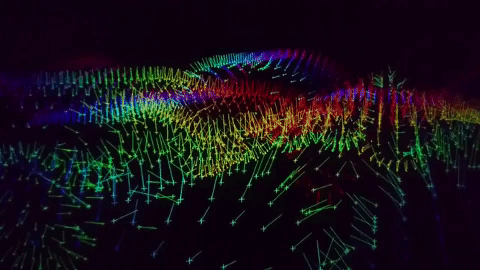
The natural next step was to use these hue/location values to populate the vertex buffer with vertex colour data that was used in the shader below. Demormation amout was mapped to hue and the indexes for calculating normals were used to average colours between neighbouring vertices.
5th of June

Then we had a BBQ.
10th of June
